Spring 与 SpringBoot

Spring 发展到今天已经形成了一种开发生态圈,Spring 提供了若干个子项目,每个项目用于完成特定的功能。

Spring 和 SpringBoot:

image.png

Spring Boot 可以帮助我们非常快速的构建应用程序、简化开发、提高效率。SpringBoot 简化配置,本质还是 Spring,SpringBoot 不能替代 Spring。官方推荐的学习路径可以从 SpringBoot 开始。

SpringBoot 使用简单快捷的原因是因为底层提供了:

  • 起步依赖:简化 pom.xml 的配置
  • 自动配置:简化 bean 的声明以及配置

当我们提到 SpringBoot 的原理时,就指的是起步依赖和自动配置的原理。在面试中,如果问 SpringBoot 原理,就是在着重问你自动配置的原理(面试高频)。

SpringBoot 的原理

起步依赖(Starters)

image.png

利用 Maven 的依赖传递,我们可以直接简单引用起步依赖即可自动引用常见依赖:

  • spring-boot-starter-web:包含了 web 应用开发所需要的常见依赖。内嵌有 Tomcat。
  • spring-boot-starter-test:包含了单元测试所需要的常见依赖。
  • spring-boot-starter-aop:AOP 起步依赖

起步依赖的版本号都在父工程中指定(在 pom.xml 中被 <parent> 标签括住的内容)。
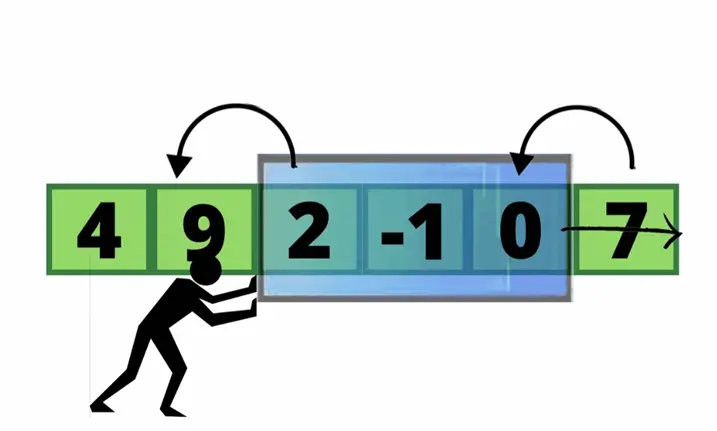
Maven 的依赖传递示意:image.png

自动配置

SpringBoot 的自动配置就是当 spring 容器启动后,一些配置类、bean 对象就自动存入到了 IOC 容器中,不需要我们手动去声明,从而简化了开发,省去了繁琐的配置操作。

IDEA 中查看所有 Bean 对象示例:

image.png

自动配置方式示例

  1. 在启动类前加上 @ComponentScan 指定扫描的范围
1
2
3
4
5
6
// 方式一:在启动类前加上 @ComponentScan 指定扫描的范围
// 这样我们自己定义的 Bean 就能使用
// 缺点:按照这种方式的话,每使用一个第三方依赖,就要指定扫描的包。导致使用繁琐,大面积扫描导致性能低。
@ComponentScan({"com.example","top.uuanqin"})
@SpringBootApplication
public class SpringbootWebConfig2Application {}
  1. 启动类前加上 @Import 导入
1
2
3
4
5
6
7
8
9
10
11
12
13
14
15
16
17
18
19
20
21
22
23
24
25
26
27
28
29
30
31
32
33
34
35
36
37
// 方式二:启动类前加上@Import导入。
// 使用 @Impor t导入的类会被 Spring 加载到IOC容器中。
// 导入形式可以是普通类、配置类、ImportSelector的接口实现类
@Import({TokenParser.class, HeaderConfig.class}) // 或者 @Import({MyImportSelector.class})
@SpringBootApplication
public class SpringbootWebConfig2Application {}

/**************** TokenParser.java *****************/
// 导入普通类:TokenParser.class,TokenParser定义时不需要加任何注解。
@Component // 此注解可有可无
public class TokenParser {
public void parse(){
System.out.println("TokenParser ... parse ...");
}
}

/**************** HeaderConfig.java *****************/
// 导入配置类:HeaderConfig.class,相关注解:@Configuration @Bean
@Configuration
public class HeaderConfig{
@Bean
public HeaderParser headerParser(){
return new HeaderParser();
}

@Bean
public HeaderGenerator headerGenerator(){
return new HeaderGenerator();
}
}

/**************** MyImportSelector.java *****************/
// 导入ImportSelector的接口实现类:MyImportSelector.class,这个类 implements ImportSelector,并实现了其中的selectImports方法
public class MyImportSelector implements ImportSelector{
public String[] selectImports(AnnotationMetadata importingClassMetadata){
return new String[]{"com.example.HeaderConfig"};
}
  1. 启动类前使用 @EnableXxxx 注解,该注解封装了 @Import。这种方式更方便和优雅,是 SpringBoot 中所采用的方式。只有第三方依赖提供者最清楚应该导入什么类。
1
2
3
4
5
6
7
8
9
10
11
12
13
14
15
16
17
// 启动类前使用 @EnableXxxx 注解
@EnableHeaderConfig // 我们只需要加上这个注解就行,就不用记指定的类了
@SpringBootApplication
public class SpringbootWebConfig2Application {}

/**************** EnableHeaderConfig.java *****************/
@Retention(RetentionPolicy.RUNTIME) // 元注解
@Target (ElementType.TYPE) // 元注解
@Import(MyImportSelector.class) // 指定导入的配置类
public @interface EnableHeaderConfig {}


/**************** MyImportSelector.java *****************/
public class MyImportSelector implements ImportSelector{
public String[] selectImports(AnnotationMetadata importingClassMetadata){
return new String[]{"com.example.HeaderConfig"}; // 第三方依赖开发者自己写的
}

源码浅析自动装配原理

启动类/引导类注解 @SpringBootApplication 是 SpringBoot 项目的基石。它封装了以下注解:

  • @SpringBootConfiguration
    • 封装了 @Configuration,用于表明该类是配置类,允许在 Spring 上下文中注册额外的 bean 或导入其他配置类。
  • @ComponentScan:组件扫描注解,默认扫描当前包及其子包
  • @EnableAutoConfiguration:SpringBoot 实现自动配置的核心。封装了:
    • @AutoConfigurationPackage。以前我们直接使用 Spring 的时候,需要在 xml 中的 context:component-scan 中定义好 base-package,那么 Spring 在启动的时候,就会扫描该包下及其子包下被 @Controller@Service@Component 标注的类,并将这些类注入到容器中。@AutoConfigurationPackage 则会将被注解标注的类,即主配置类,将主配置类所在的包当作 base-package,而不用我们自己去手动配置了。这也就是为什么我们需要将主配置类放在项目的最外层目录中的原因。
    • @Import(AutoConfigurationImportSelector.class)AutoConfigurationImportSelector 类中读取以下文本文件。但是文本文件标识的类只会根据需要(条件装配 @Conditional)进行加载。
      • META-INF/spring/org.springframework.boot.autoconfigure.AutoConfiguration.imports(2.7.0 之后的版本)
      • META-INF/spring.factories(老版本,目前的存在只为兼容)

我们发现,文本文件 META-INF/spring/xxx.imports 中定义了许多许多的 Bean,但并不是所有的 Bean 都会注册到 IOC 容器。声明 @Bean 对象前,可以添加注解 @Conditional@Conditional 按照一定的条件进行判断,在满足给定条件后才会注册对应的 bean 对象到 Spring IOC 容器中。作用在方法或类中。

@Conditional 本身是一个父注解,派生出大量的子注解。常用的有:

  • @ConditionalOnClass:判断环境中是否有对应字节码文件,才注册 bean 到 IOC 容器
  • @ConditionalOnMissingBean:判断环境中如果没有对应的 bean(类型 或 名称),才注册 bean 到 IOC 容器。主要用于声明默认 Bean 对象。指定类型(value 属性)或名称(name 属性)。
  • @ConditionalOnProperty:判断配置文件中有对应属性和值,才注册 bean 到 IOC 容器。
1
2
3
4
5
6
7
8
9
10
11
@Bean
@ConditionalOnClass(name ="io.jsonwebtoken.Jwts")//当前环境存在指定的这个类时,才声明该bean
public HeaderParser headerParser(){...}

@Bean
@ConditionalOnMissingBean //当不存在当前类型的bean时,才声明该bean
public HeaderParser headerParser(){...}

@Bean
@ConditionalOnProperty(name ="name",havingValue ="itheima")//配置文件中存在对应的属性和值,才注册bean到IOC容器
public HeaderParser headerParser(){...}

自定义 Starter 示例

Starter

起步依赖 Starter 的应用场景:

  • 在实际开发中,经常会定义一些公共组件,提供给各个项目团队使用。而在 SpringBoot 的项目中,一般会将这些公共组件封装为 SpringBoot 的 starter。
  • 开发 SDK,方便他人调用功能。使用 SDK 的开发人员只需要关心调用接口的方式和传递的参数。可以在 application.yml 中进行配置。

命名规范:

  1. SpringBoot 官方提供的起步依赖,它的命名基本上就是 spring-boot-...
    • 自动配置功能:spring-boot-autoconfigure
    • 依赖管理功能:spring-boot-starter-xxx
  2. 第三方提供的起步依赖命名规范:功能-spring-boot-...
    • 自动配置功能:xxx-spring-boot-autoconfigure
    • 依赖管理功能:xxx-spring-boot-starter

上面两个关键的模块:starterautoconfigure

  • starter 模块进行依赖管理功能,里面没有任何 Java 代码,它的作用在于配置好 pom.xml。会将 autoconfigure 自动配置模块引入进来。

案例介绍

本文演示的案例:

  • 需求:自定义 myrandom-spring-boot-starter,完成返回随机数工具类 MyRamdomUtils 的自动配置。我们通过编写配置文件指定随机数字符串的长度。
  • 目标:引入起步依赖之后,要想使用自己的工具类时,直接注入 MyRamdomUtils 使用即可

在使用自定义 Starter 之前,我们使用自己的工具类是需要完成以下工作:

1
2
3
4
5
6
7
8
9
10
11
<!-- pom.xml -->
<!-- 需要引入大量的依赖 -->
<dependency>
<groupId>com.example</groupId>
<artifactId>ramdom</artifactId>
<version>1.0.0</version>
</dependency>
...
<dependency>
...
</dependency>
1
2
3
4
5
6
7
8
9
10
11
12
13
14
15
/************************* 定义参数配置类 *************************/
@Data
@Component
@ConfigurationProperties(prefix = 'myrandom')
public class MyRamdomProperties{
...
}

/************************* 自己写一个工具类 *************************/
@Component
public class MyRamdomUtils{
@Autowired
private MyRamdomProperties myRamdomProperties;
...
}
1
2
3
4
5
# application.yml
# 配置随机数工具类
myrandom:
length: 5
...

我们需要自己引入大量的依赖,还要定义参数配置类,并实现工具类。创建完自定义 Starter 后,我们只需注入 Bean 并配置即可。

自定义 Starter 基本步骤:

  • 创建 myrandom-spring-boot-starter 模块,进行依赖管理功能。
  • 创建 myrandom-spring-boot-autoconfigure 模块,在 starter 中引入该模块,进行自动配置。
  • myrandom-spring-boot-autoconfigure 模块中的定义自动配置功能,并定义自动配置文件 META-INF/spring/xxx.imports(新版本 SpringBoot)

创建 starter 模块

在 IDEA 中创建新项目 demo-starter 空的工程:

image.png

项目里面创建 starter 模块:

image.png

如果 IDEA 没有识别为 Spring 项目,可以右键 pom.xml 选择 Add as Maven Project 选项即可。

后续我们可以在 pom.xml 根据需要改低一下 springboot 的版本。

pom.xml 删除以下多于的信息,比如:

  • 指定正确的 SpringBoot 版本
  • 删去描述性的内容标签,比如 <name> <description>
  • 删去不必要的测试依赖,保留基础的 spring-boot-starter 就行。
  • 删去不使用的插件
1
2
3
4
5
6
7
8
9
10
11
12
13
14
15
16
17
18
19
20
21
22
23
24
25
26
27
28
29
30
31
32
33
34
35
36
37
38
39
40
41
42
43
44
45
46
47
48
49
50
51
52
53
54
55
<?xml version="1.0" encoding="UTF-8"?>
<project xmlns="http://maven.apache.org/POM/4.0.0" xmlns:xsi="http://www.w3.org/2001/XMLSchema-instance"
xsi:schemaLocation="http://maven.apache.org/POM/4.0.0 https://maven.apache.org/xsd/maven-4.0.0.xsd">
<modelVersion>4.0.0</modelVersion>
<parent>
<groupId>org.springframework.boot</groupId>
<artifactId>spring-boot-starter-parent</artifactId>
<version>2.7.5</version>
<relativePath/> <!-- lookup parent from repository -->
</parent>
<groupId>top.uuanqin</groupId>
<artifactId>myrandom-spring-boot-starter</artifactId>
<version>0.0.1-SNAPSHOT</version>
<!-- 描述类信息删掉-->
<!-- <name>myrandom-spring-boot-starter</name>-->
<!-- <description>myrandom-spring-boot-starter</description>-->
<url/>
<licenses>
<license/>
</licenses>
<developers>
<developer/>
</developers>
<scm>
<connection/>
<developerConnection/>
<tag/>
<url/>
</scm>
<properties>
<java.version>17</java.version>
</properties>
<dependencies>
<dependency>
<groupId>org.springframework.boot</groupId>
<artifactId>spring-boot-starter</artifactId>
</dependency>
<!-- 单元测试不需要,可以直接删掉-->
<!-- <dependency>-->
<!-- <groupId>org.springframework.boot</groupId>-->
<!-- <artifactId>spring-boot-starter-test</artifactId>-->
<!-- <scope>test</scope>-->
<!-- </dependency>-->
</dependencies>
<!-- 插件不需要,可以直接删掉-->
<!-- <build>-->
<!-- <plugins>-->
<!-- <plugin>-->
<!-- <groupId>org.springframework.boot</groupId>-->
<!-- <artifactId>spring-boot-maven-plugin</artifactId>-->
<!-- </plugin>-->
<!-- </plugins>-->
<!-- </build>-->

</project>

然后刷新并重新加载依赖。

因为 starter 模块仅仅进行依赖管理,我们需要对模块进行规整和清理:

  • 对 starter 模块文件夹下只要保留 pom.xml 文件即可,其余文件如 .mvnsrcmvnw 等全部删除。(如果有 .iml IDEA 配置文件文件可视情况保留)

创建 autoconfigure 模块

创建过程同上。pom.xml 规整过程同上(即删除描述类信息、测试依赖以及插件)。

对于 autoconfigure 模块我们进行以下规整:除了保留 pom.xml 文件和 .iml 文件外,保留 src 文件夹用于存放编写的 Java 代码。src 文件夹需要删掉以下内容:

  • 删除启动类 XXXSpringBootAutoconfigApplication。作为第三方模块,我们不需要启动类。
  • 删除配置文件 application.properties
  • 如果有的话,删除测试文件夹 test.java (不含)下的所有文件。

starter 模块引入 autoconfigure 模块

在 starter 模块引入 autoconfigure 模块三要素。

1
2
3
4
5
<dependency>
<groupId>top.uuanqin</groupId>
<artifactId>myrandom-spring-boot-autoconfigure</artifactId>
<version>0.0.1-SNAPSHOT</version>
</dependency>

刷新 Maven。

编写 autoconfigure 模块

autoconfigure 模块的 pom.xml 引入生成随机数所需要的依赖。比如,我们使用了 Hutool 提供的 RandomUtil.randomNumbers 生成一个指定长度的随机数字字符串。

Hutool 是一个小而全的 Java 工具类库,通过静态方法封装,降低相关 API 的学习成本,提高工作效率,使 Java 拥有函数式语言般的优雅,让 Java 语言也可以“甜甜的”。

在 IDEA 创建模块的向导中,可以提前勾选依赖以自动引入 spring-boot-configuration-processorimage.png或者自行在 pom.xml 中添加。

1
2
3
4
5
6
7
8
9
10
11
12
13
14
15
16
17
18
19
20
<!-- pom.xml -->
<!-- 需要引入的依赖 -->

<!-- hutool工具包 -->
<dependency>
<groupId>cn.hutool</groupId>
<artifactId>hutool-all</artifactId>
<version>5.8.26</version>
</dependency>

<!-- 必要的依赖,用于写配置文件的依赖 -->
<dependency>
<groupId>org.springframework.boot</groupId>
<artifactId>spring-boot-configuration-processor</artifactId>
<optional>true</optional>
</dependency>
...
<dependency>
...
</dependency>

定义参数配置类:

1
2
3
4
5
6
7
8
9
10
11
12
13
14
15
16
// 定义参数配置类
// 可以使用 Lombok 的 @Data 注解免去手写Getter和Setter
// 去掉 @Component。因为如果定义 @Component,使用这个starter的项目的人需要知道这个包的位置,并通过@ComponentScan扫描注入Bean,这显然是不合理的。
@ConfigurationProperties(prefix = "myrandom")
public class MyRandomProperties {
private int length;

public int getLength() {
return length;
}

public void setLength(int length) {
this.length = length;
}
}

@ConfigurationProperties 注解

和配置文件(比如 application.yml)进行绑定,将配置文件中对应的配置映射到对象的属性中。在这里是把配置文件 myrandom.lenth 中的值映射到 MyRandomProperties 对象的 length 中。详见:SpringBoot 中的配置

写自己的工具类,也就是我们要提供的服务:

1
2
3
4
5
6
7
8
9
10
11
12
13
14
15
16
17
18
19
20
21
22
23
24
// 自己写一个工具类
// 这里不需要 @Component。理由同上。
public class MyRandomUtils {

private MyRandomProperties myRandomProperties;

public MyRandomProperties getMyRandomProperties() {
return myRandomProperties;
}

public void setMyRandomProperties(MyRandomProperties myRandomProperties) {
this.myRandomProperties = myRandomProperties;
}


/**
* 提供给外部的函数
* @return
*/
public String getRamdomNumber(){
return RandomUtil.randomNumbers(myRandomProperties.getLength());
}

}

新增一个自动配置类:MyRamdomAutoConfiguration

1
2
3
4
5
6
7
8
9
10
11
12
13
14
15
16
17
@Configuration // 配置类
@EnableConfigurationProperties(MyRandomProperties.class) // 回忆,上面在MyRandomProperties类的定义中,它并不是一个Bean,此时通过本注解使其变为一个Bean
public class MyRamdomAutoConfiguration {

/**
* 返回对象类型为MyRandomUtils。方法名随便定义。
* @param myRandomProperties
* @return
*/
// 回忆:在第三方 bean 需要依赖其它 bean 对象,直接在 bean 定义方法中设置形参即可,容器会根据类型自动装配。
@Bean // 把MyRandomUtils声明为Bean
public MyRandomUtils myRandomUtils(MyRandomProperties myRandomProperties){
MyRandomUtils myRandomUtils = new MyRandomUtils();
myRandomUtils.setMyRandomProperties(myRandomProperties);
return myRandomUtils;
}
}
@Configuration 注解

告诉 Spring Boot 这是一个配置类,可以在该类中创建 Bean。更多声明第三方 Bean 细节详看:SpringBoot 中的 IOC & DI 入门

resources 目录下新建文件 META-INF/spring/org.springframework.boot.autoconfigure.AutoConfiguration.imports ,文件中编写内容使得自动配置类 MyRamdomAutoConfiguration 能被 SpringBoot 加载。

1
top.uuanqin.MyRamdomAutoConfiguration

按顺序依次执行 Maven install 命令,将其安装为本地的依赖:

  • Maven 中对 myrandom-spring-boot-autoconfigure 执行 install 命令
  • Maven 中对 myrandom-spring-boot-starter 执行 install 命令

使用自定义 Starter

在任何需要使用自己编写的 SDK 项目中引入一个 starter 依赖:

1
2
3
4
5
<dependency>
<groupId>top.uuanqin</groupId>
<artifactId>myrandom-spring-boot-starter</artifactId>
<version>0.0.1-SNAPSHOT</version>
</dependency>

配置文件:

1
2
3
# application.yml
myrandom:
length: 5

Java 测试类中使用:

1
2
3
4
5
6
7
8
9
10
11
@SpringBootTest
class DemoInterfaceApplicationTests {
@Resource
private MyRandomUtils myRandomUtils;

@Test
void contextLoads() {
UseUtils useUtils = new UseUtils();
System.out.println(myRandomUtils.getRamdomNumber());
}
}

完成。

后记

上面介绍案例的步骤可能比较多,分的模块比较细。但开发 starter 可以很灵活,不一定非得建立两个模块,也不一定非得全部建立案例中三个类,可以杂合在一起,跑通就行。

后续任务:

  • 完成将自己的模块发布到 Maven 仓库

本文参考